Matchingham SDK Introduction
Getting Started
Matchingham SDK works with Unity 2022.3+
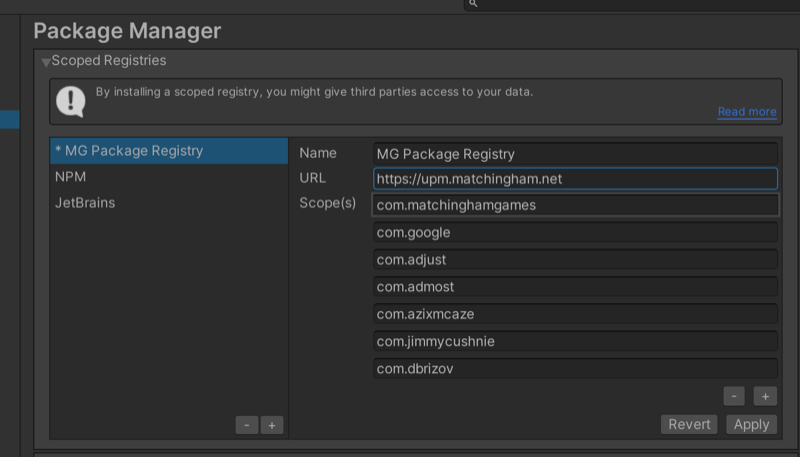
Get started by Adding New Scopes. Head over this path and fill out the registries as shown in the image below
Unity Editor > Project Settings > Package Manager > Scoped Registries
or you can append this object to Packages/manifest.json file.
  "scopedRegistries": [
    {
      "name": "MG Package Registry",
      "url": "https://upm.matchingham.net",
      "scopes": [
        "com.matchinghamgames",
        "com.google",
        "com.admost",
        "com.azixmcaze",
        "com.jimmycushnie",
        "com.dbrizov",
        "com.usercentrics",
        "com.apple"
      ]
    },
    {
      "name": "NPM",
      "url": "https://registry.npmjs.org",
      "scopes": [
        "com.onesignal"
      ]
    },
    {
      "name": "JetBrains",
      "url": "https://npm.pkg.jetbrains.space/public/p/jetbrains-gamedev/jetbrains-gamedev/",
      "scopes": [
        "com.jetbrains"
      ]
    },
    {
      "name": "OpenUPM",
      "url": "https://package.openupm.com",
      "scopes": [
        "com.openupm",
        "com.adjust",
        "com.yasirkula",
        "com.coffee",
        "com.google.ads",
        "com.cysharp",
        "com.marijnzwemmer",
        "com.gameanalytics",
        "com.neuecc",
        "com.mackysoft"
      ]
    },
    {
      "name": "AppLovin MAX Unity",
      "url": "https://unity.packages.applovin.com/",
      "scopes": [
        "com.applovin.mediation.ads",
        "com.applovin.mediation.adapters",
        "com.applovin.mediation.dsp"
      ]
    }
  ]
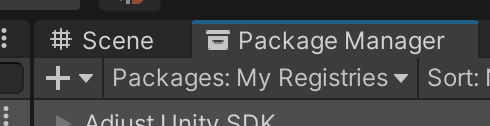
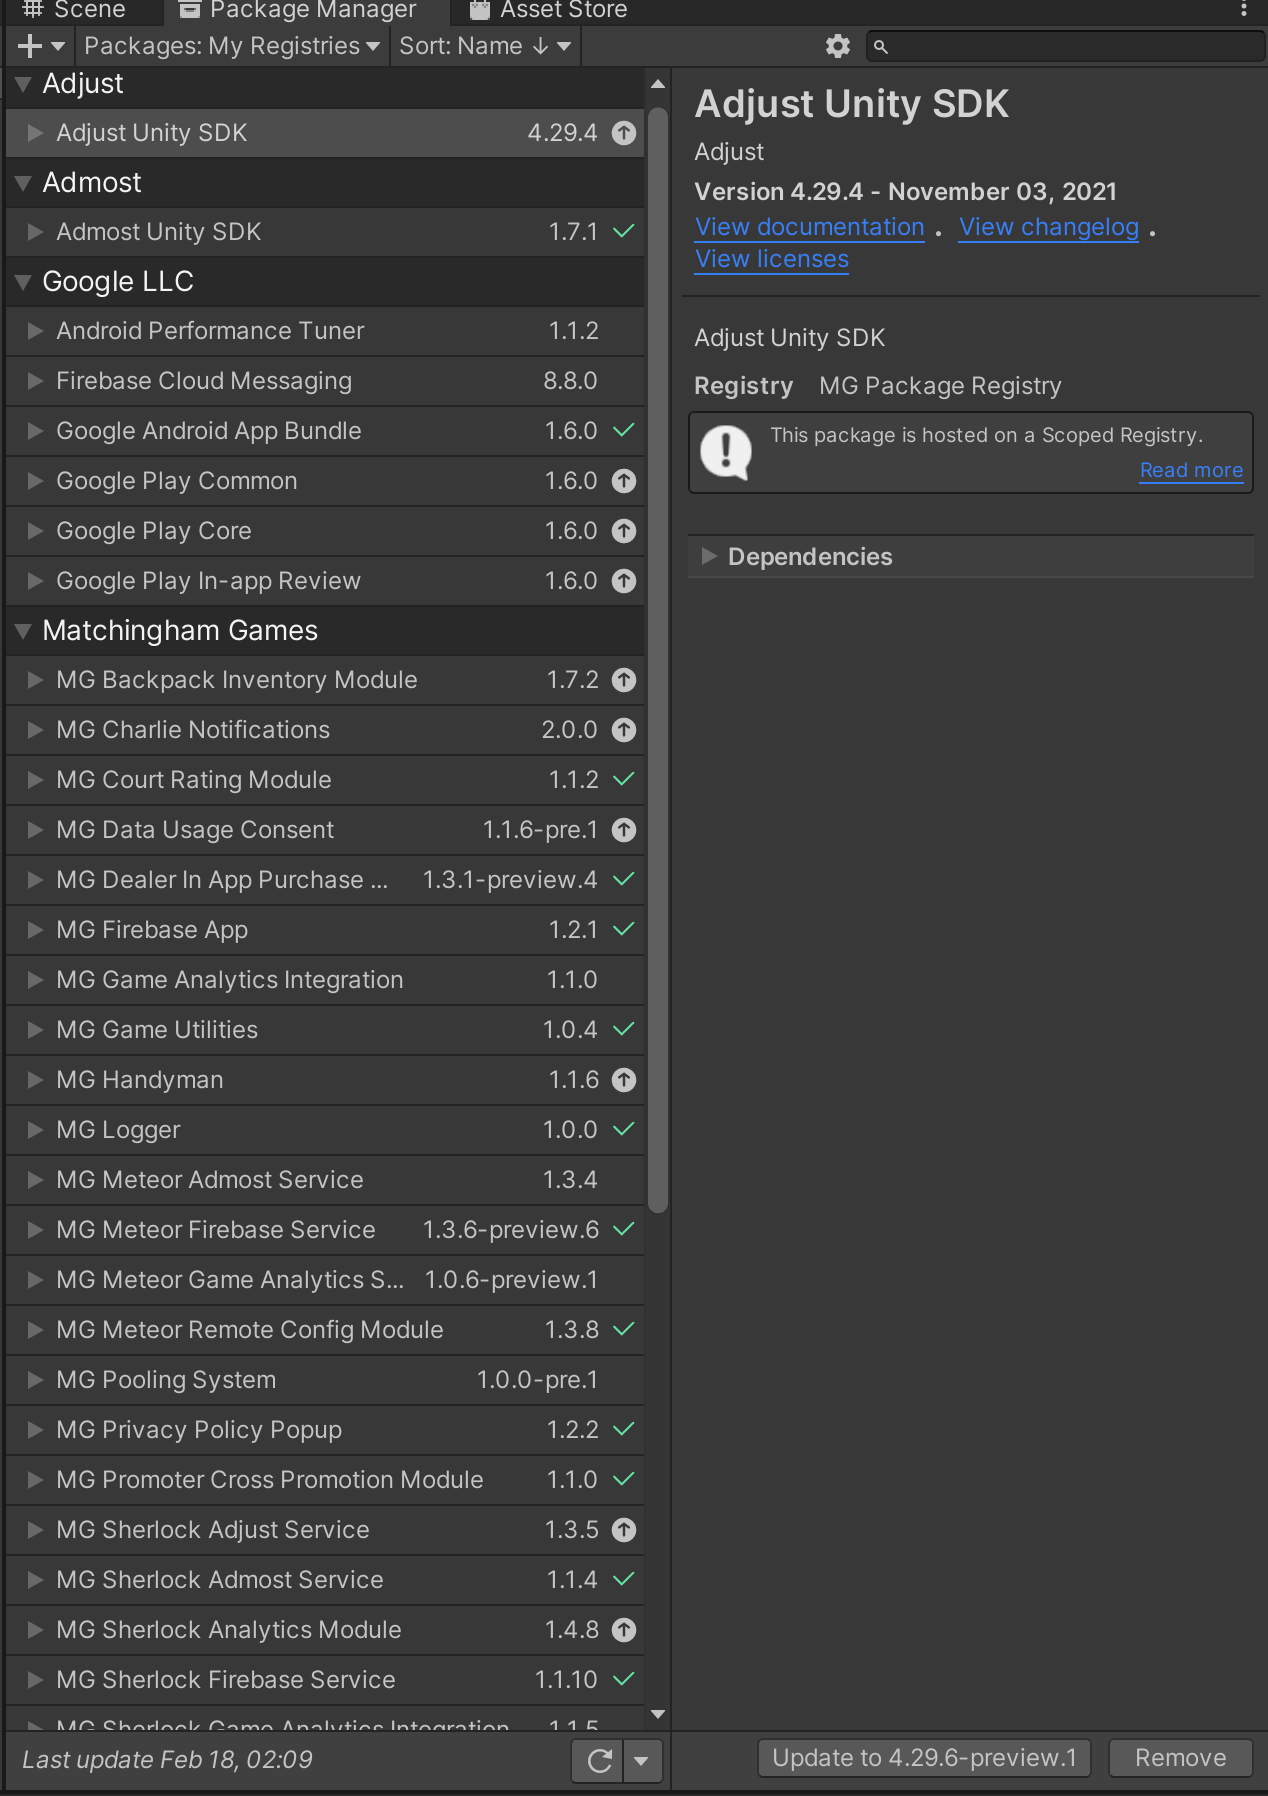
Now you will be able to access all packages inside Unity Package Manager. Change packages to My Registries.
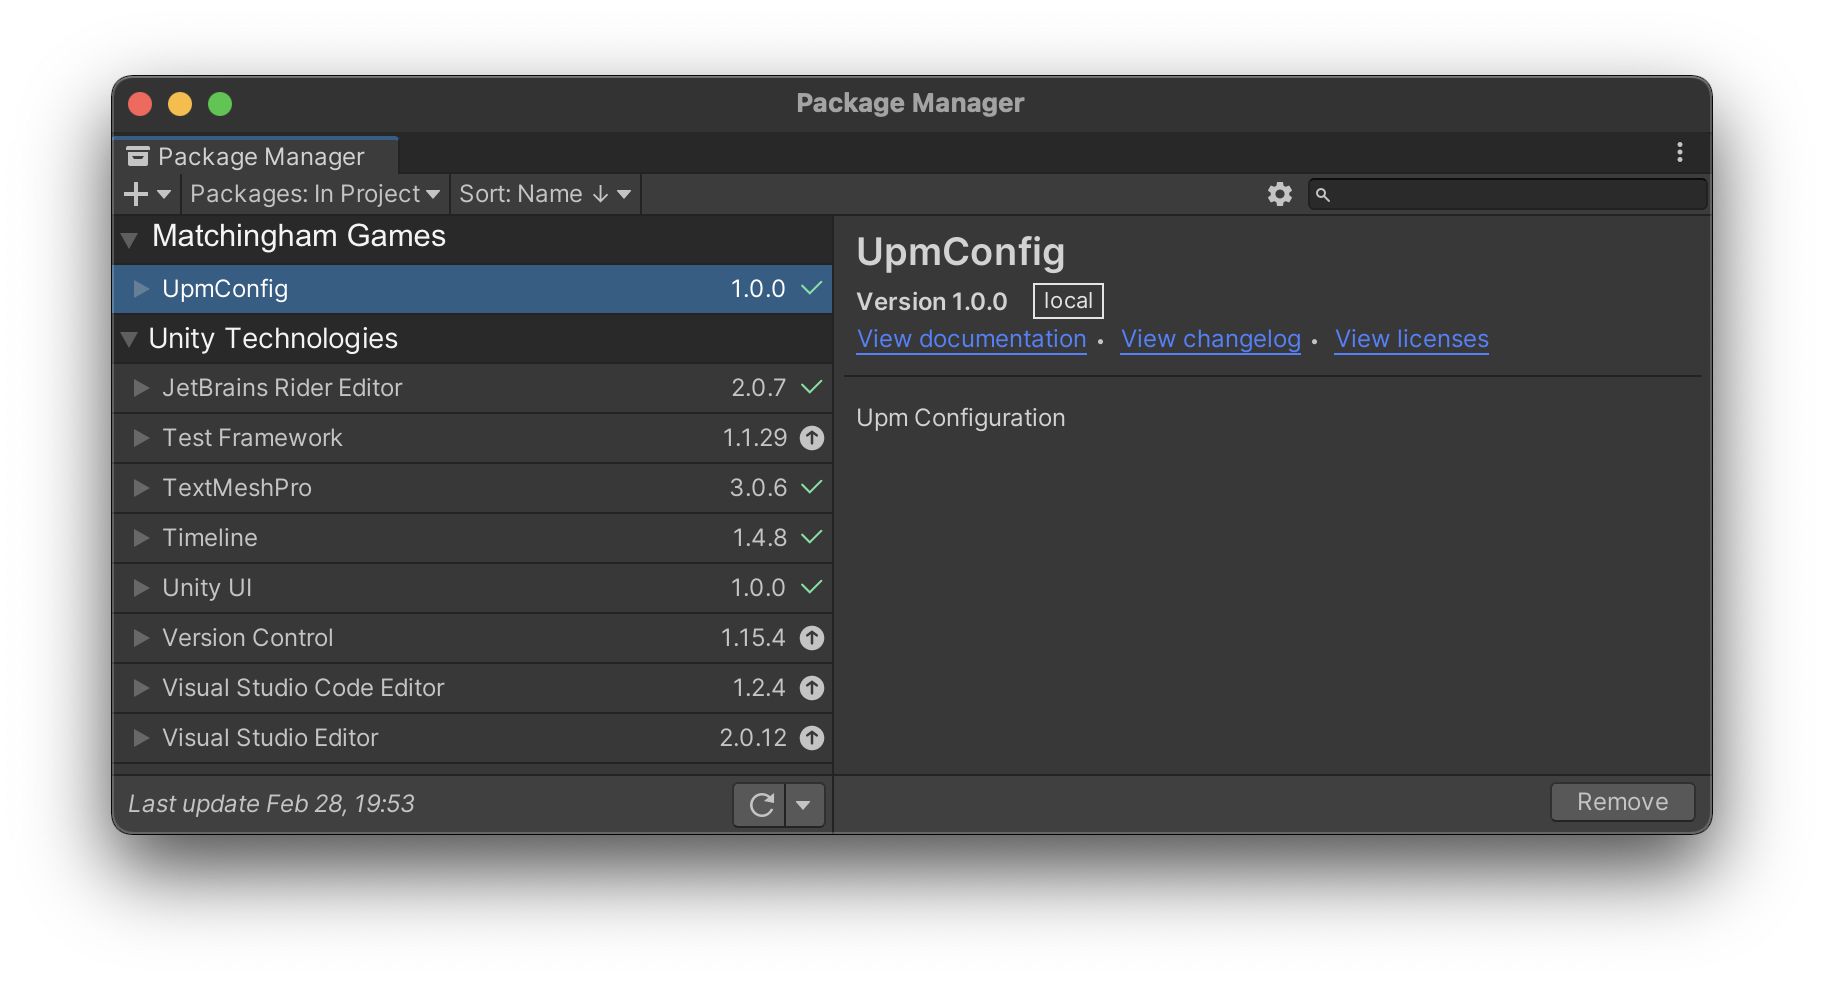
Now you will see the list of packages. If you haven't authenticated yourself you will only be able to see UPM Config package under Matchingham registeries. To see all available packages from Matchingham SDK, you should install that one package and move into next steps from here.
Upm Authentication
Before you move to the next step, please contact with Matchingham SDK admin and provide them with your GitLab username.
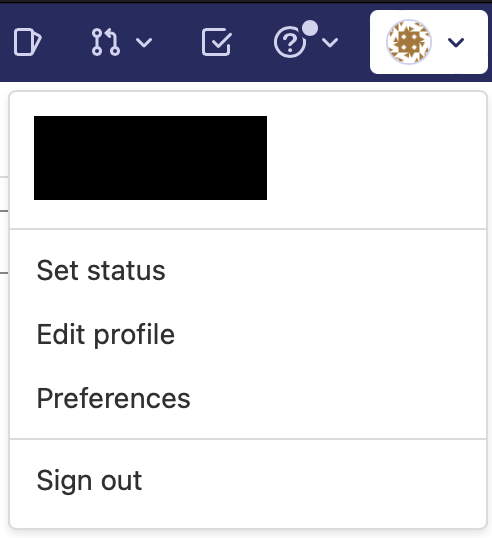
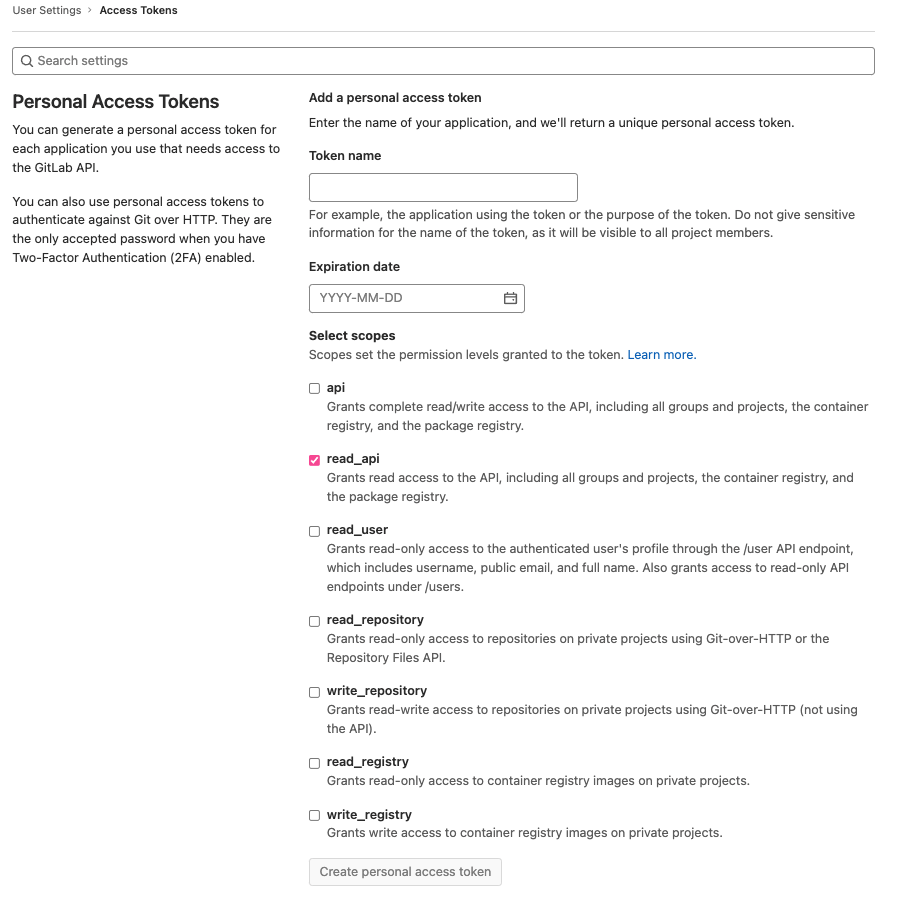
Firstly you have to create an access token from your gitlab account in Matchingham's Private Gitlab Server. To do so, you have to sign in to your gitlab account and go to preferences from dropdown menu by clicking on your profile image on top right.
Then you have to click on the Access Tokens menu on the left. Here you can create an access token by giving it a name. You have to have read_api option selected before creating your token. After that an access token will appear on the top of the screen when you click create. Then you have to copy that token into your clipboard and save it on your computer because you won't be able to get it again.
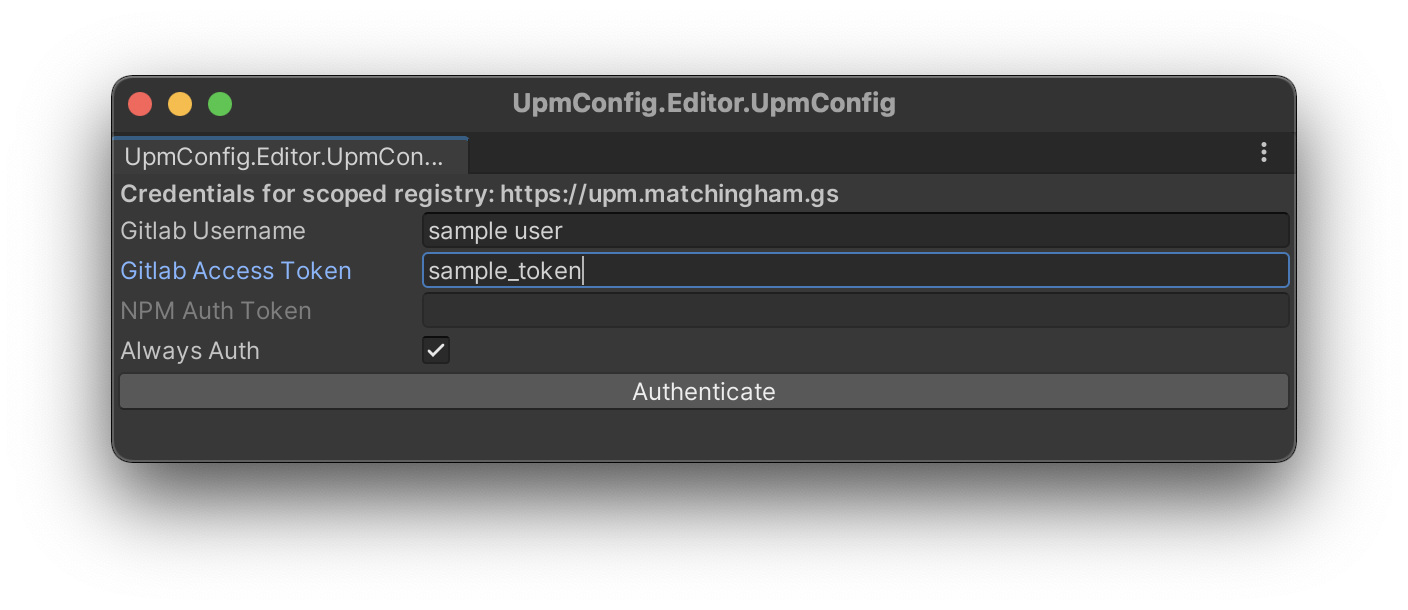
After getting the access token, move back to the Unity and from top bar go to Matchingham -> UpmConfig. This will open up a window where you can put your gitlab username and access token. After filling in those fields, you can now click on Authenticate button to be authenticated. Following this step, another window will appear with authentication result.
Once you have completed the authentication steps, you can remove the package from your project. You will be automatically authenticated for the SDK usages in the future on the same device.
Now you should be able to see all the packages from Matchingham SDK. If you aren't seeing the full list, try refreshing the packages list or restart Unity. You can start installing packages from package manager.
If you get any errors about package dependency after installation, please try updating the package to the latest version using package manager. This will resolve any issues that may rise.
MG packages needs Odin Inspector and SRDebugger assets. In order to use SDK you have to add this assets into your projects. Also, make sure that you have installed the latest version of them.
After adding the appropriate packages into your project, you would need to add an initializer script that calls all the required initializer methods of each SDK that you integrated. To do so, you can make use of a script like below.
    /// <summary>
    /// This method must be called within Start method in order to initialize
    /// all modules at an earliest time. Don't make the initialization in the
    /// Awake method.
    /// </summary>
    private void InitializeMGSDK()
    {

      // It is important to initialize Watcher first to track startup and modules' duration.
      Watcher.Instance.Initialize();
      Watcher.Instance.WhenReady(_ =>
      {
          Apollo.Instance.Initialize(); // Init Apollo Audio Module
          Vibrator.Instance.Initialize(); // Init Vibration Module

          Backpack.Instance.Initialize(); // Init Backpack Inventory Module
          Backpack.Instance.WhenReady(_ =>
          {
            // It is important to initialize Backpack module before Dealer
            Dealer.Instance.Initialize(); // Init Dealer In-app Purchase Module
          });

          Court.Instance.Initialize(); // Init Court Rating/Review Module

          PrivacyPolicy.Instance.Initialize(); // Init Privacy Policy Module
          PrivacyPolicy.Instance.WhenReady(_ =>
          {
            DataUsageConsentManager.Instance.Initialize();
            DataUsageConsentManager.Instance.WhenReady(_ =>
            {
              Sherlock.Instance.Initialize(); // Init Sherlock Analytics Module

              // If you have your own ScriptableObjects that have [RemoteSetting] attributes, register them to Meteor before initializing Meteor.
              // e.g. Meteor.ConfigList.Add(MyConfig);

              Meteor.Instance.Initialize(); // Init Meteor Remote Config Module
              Meteor.Instance.WhenReady(_ => // Set callback method for when the module is ready
              {
                Enforcer.Instance.Initialize(); // Init Enforcer Force Update Module
                Enforcer.Instance.WhenReady(_ => // Set callback method for when the module is ready
                {
                  // After Enforcer initialization, if the game need to be updated, there is no need to initialize other modules.

                  Charlie.Instance.Initialize(); // Init Charlie Notification Module

                  Promoter.Instance.Initialize(); // Init Promoter Cross Promotion Module

                  // It is recommended to wait Sherlock module before Vegas' initialization
                  Sherlock.Instance.WhenReady(_ =>
                  {
                    Vegas.Instance.Initialize(); // Init Vegas Mediation Module
                    Vegas.Instance.WhenReady(_ => {
                      // call your methods to start game here if you want to wait Vegas' initialization
                    });
                      // or here if you don't want to wait Vegas
                  });
                });
              });
            });
        });
      });
    }